Using Postman to access the Bitwarden API
Postman is a popular tool used by both developers and users of APIs. Available in both browser and desktop versions, it can be used to simplify interactions with any API, including Bitwarden’s APIs.
This guide will take you through the configuration of the Postman desktop app for the Bitwarden Public API.
Install Postman
Firstly, download the appropriate Postman desktop application for your hardware and operating system and follow the installation instructions:
Collect Bitwarden API Key
Once you have done so, prepare the Organisational API Key and Secret, as documented here:

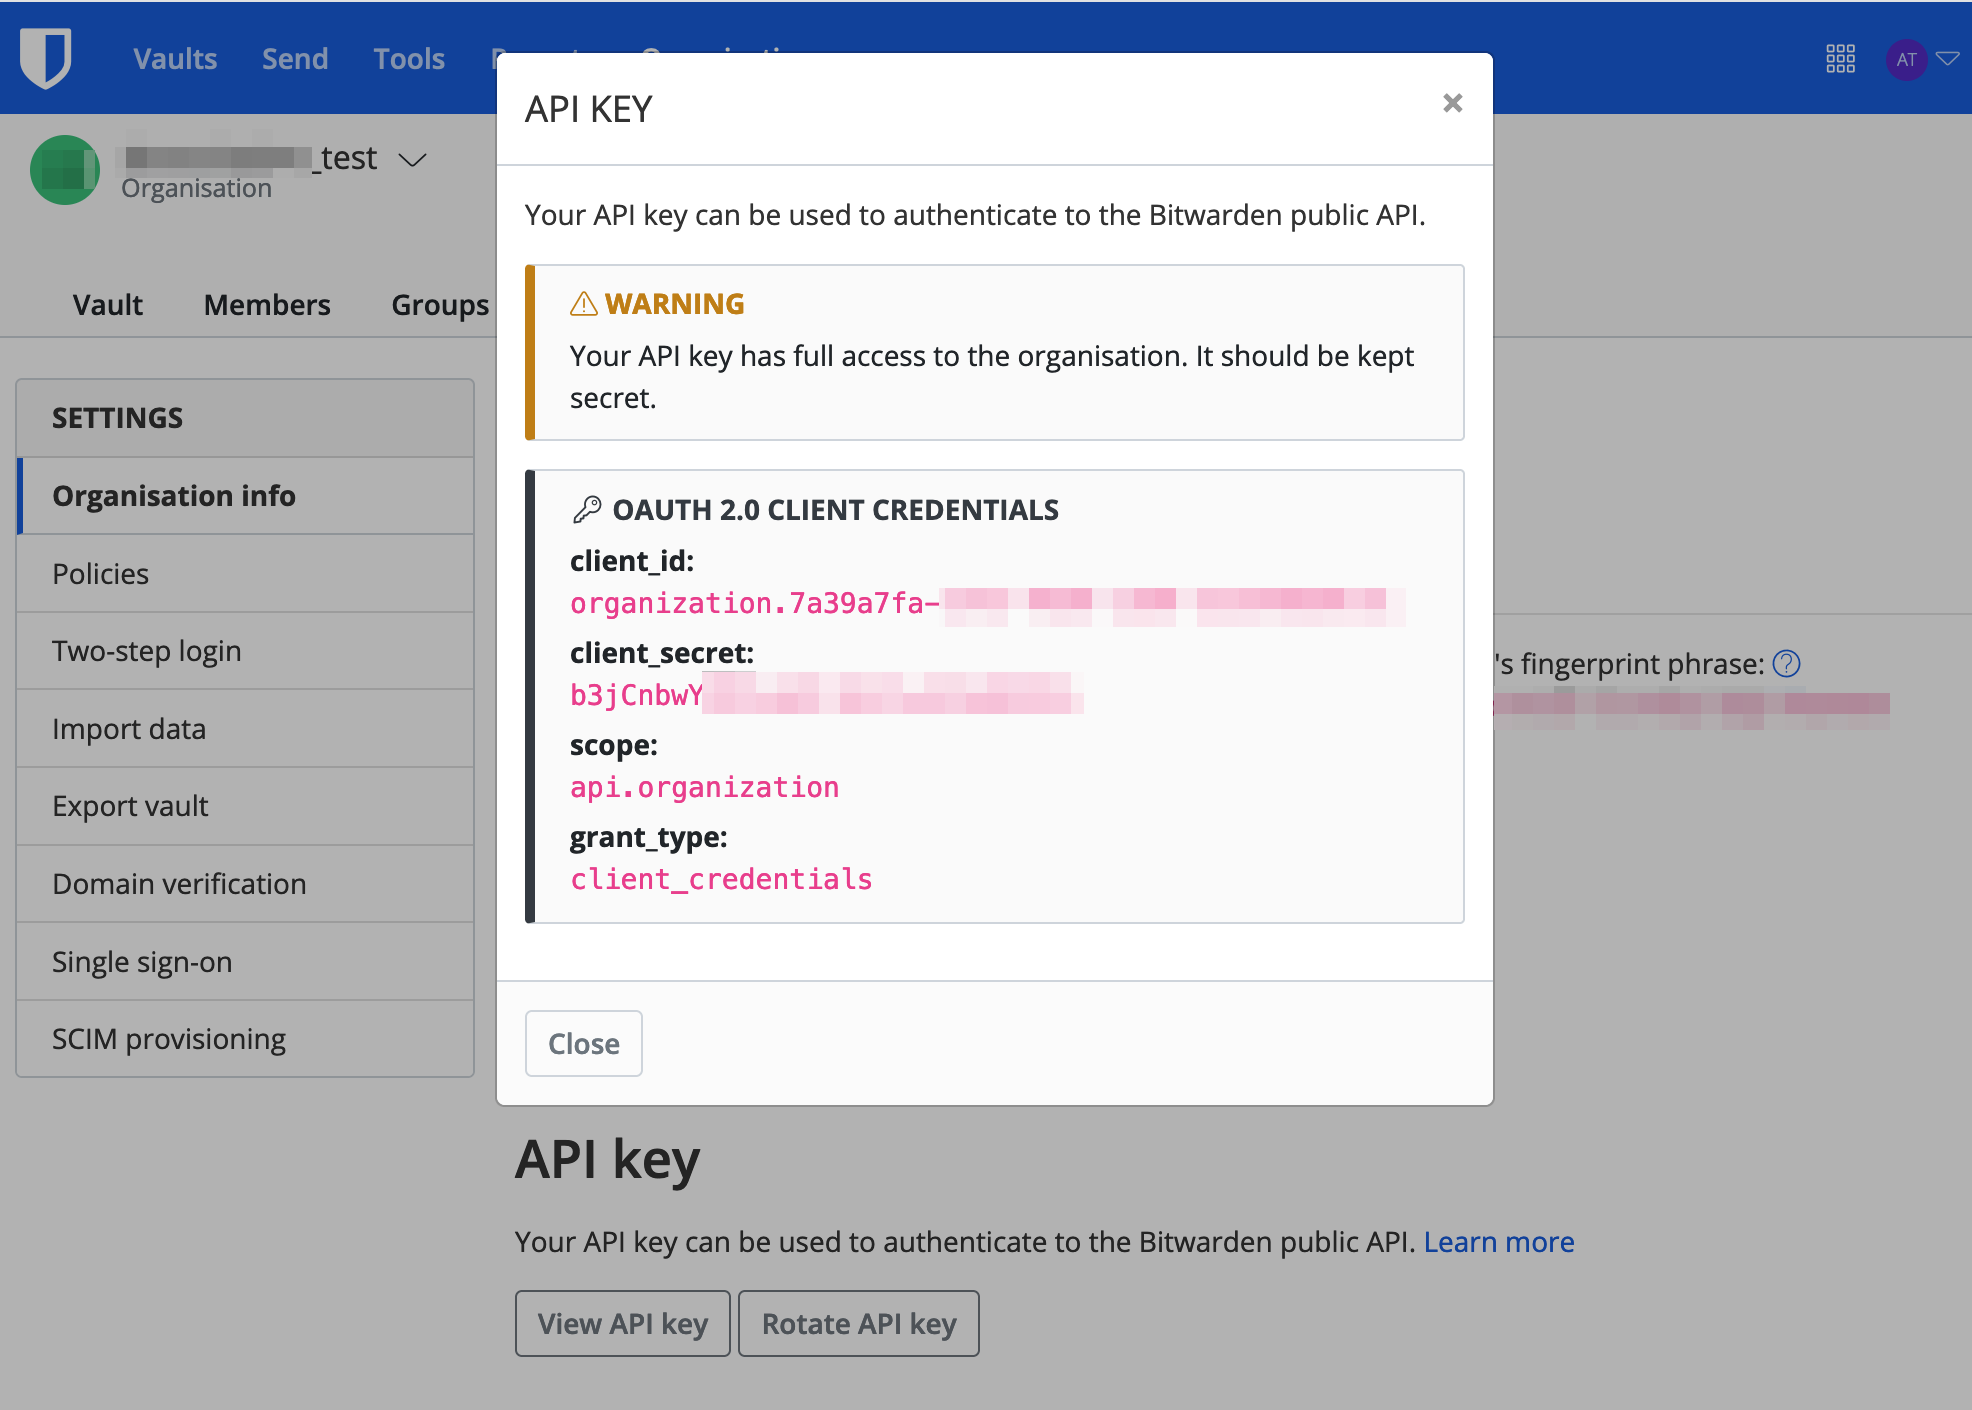
You need to copy the client_id and client_secret values.
NOTE:
Personal API keys will start ‘user’, whereas organisational API keys will start ‘organization’. Ensure that you are using the correct key.
Create a Collection in Postman
At the top-left you’ll find the option to create a new COLLECTION in Postman. Collections will contain all the API calls that you’ll later make for a particular API, as well as the necessary authorisation steps.

Configure Authentication
The Bitwarden API uses an Authentication type called OAuth2.0, which requires a bearer token to be presented alongside all API calls made. The correct configuration for this in Postman is shown below:

The required fields are:
Add auth data to: Request Headers
Grant Type: Client Credentials
Access Token URL: https://identity.bitwarden.com/connect/token (see Bitwarden Public API | Bitwarden for the self-hosted API endpoints)
Client ID: client_id obtained in step #2 (Collect Bitwarden API Key)
Client Secret: client_secret obtained in step #2 (Collect Bitwarden API Key)
Client Authentication: Send as Basic Auth header
Once you have input this information, you should get a token (#1), and once you have received a success message, you must Save these settings (#2):

Here is what you’ll be shown once you’ve successfully received your bearer token:

Make an API call
Now that you have configured the authentication for this collection and saved it, you will be able to make API calls to the Bitwarden Public API.
The list of available API endpoints and schema is found here:
https://bitwarden.com/help/api
In Postman, click the ‘ + ‘ button in order to make a new API call inside your collection:

As an example, we’ll make a GET request to the /public/collections endpoint, which will return a list of my organisation’s collections. See below for how to configure this:

#1 - fill out the FQDN of the API endpoint
#2 - set the authorisation type to OAuth2.0
#3 - select one of the tokens generated in the previous step to be used. Postman will track the validity of these tokens (1 hour), and will inform you when you need to generate a new token if your previous one has expired.
#4 - click Send to submit your call
A successful call will return data in json format:

You can now save this API call if you feel that it is one you’d like to use in the future.
Make an API call using Parameters
Some of the API endpoints will accept parameters in order to filter the data that you receive. For example, the /public/collections endpoint will change its behaviour if it is supplied a collection ID as a parameter, or eventlogs can be filtered by start and end dates. In the example below, we are passing example start and end parameters to Postman, along with correctly formatted values, to return only a limited subsection of the eventlogs for this organisation.
NOTE:
The same authorisation settings (i.e., a pre-made token), must be used as previously via the Authorization tab.

Import all API Endpoints via Swagger/OpenAI json file
Bitwarden also declares its API endpoints in the form of JSON file, which can be downloaded at the bottom of the page (Download Swagger JSON File)
This .json can then be imported (File → Import) into Postman, which will pre-populate all of the available API endpoints. The authentication configuration for this imported collection can then be performed as described above.
Summary
That should be enough to get you up and running using Postman. Recommended topics include setting your secrets with Variables (Store and reuse values using variables | Postman Docs), using the Postman VS Code plugin (Develop APIs with the Postman VS Code extension | Postman Docs), and collaborating with your team in Postman (Collaborate in Postman | Postman Docs)
It’s also important to note that Postman is only one way to access the Bitwarden API. Look out for future guides and code examples using curl and python.