understand how to create custom field. now I want the custom field to autofill. That wb making it “linked custom field” ?
simply changing the designation of a custom field didn’t make it autofill.
understand how to create custom field. now I want the custom field to autofill. That wb making it “linked custom field” ?
simply changing the designation of a custom field didn’t make it autofill.
The custom field type (“Linked”, “Text”, “Hidden”, or “Boolean”) does not determine whether it auto-fills or not.
When you create a custom field of any type, you have to set its Name to an identifier name that matches what is used for the input field in the HTML source code of the web form. If the Name of the custom field cannot be matched to a field identifier in the HTML soruce code, then the value stored in the custom field will not be auto-filled. You state that you already understand this, so I’ll skip the step-by-step instructions for naming a custom field unless you ask.
The next thing that is required for auto-fill to be possible is to have a URI stored in the vault item that matches the URI of the web form that you wish to autofill. If the badge counter on the Bitwarden extension icon is displayed with a value of 1 or greater, then the current web page is matched by one or more vault items. If you don’t see a badge counter when going to a webpage where you want auto-fill to work, let us know, so that we can help troubleshoot.
Finally, the auto-fill will not occur unless it is triggered. You can manually trigger the auto-fill (e.g., by clicking the corresponding account shown in the “Tab” view of the browser extension, or by using the right-click context menu, or by using the keyboard shortcut Ctrl+Shift+L), but I have a sense that you would prefer for auto-filling to occur automatically. To automatically auto-fill your custom field as soon as the web form has opened, go to Settings > Options and enable the option Auto-fill on page load.
If none of the above information solves your problem, you will need to provide additional context about what you are attempting to do.
Helpful. Read up on using URI’s also.
a. So the difference between “1” and say “3” is irrelevant for my purposes, as long as the counter is at least “1” ?
b. For one of the sites that shows a “1” counter and Shift Ctrl L fills in the empty fourth field, where would I find " Settings > Options and enable the option Auto-fill on page load" for Chrome.
I clicked on the BW extension “settings” in Chrome but didn’t find see “options”
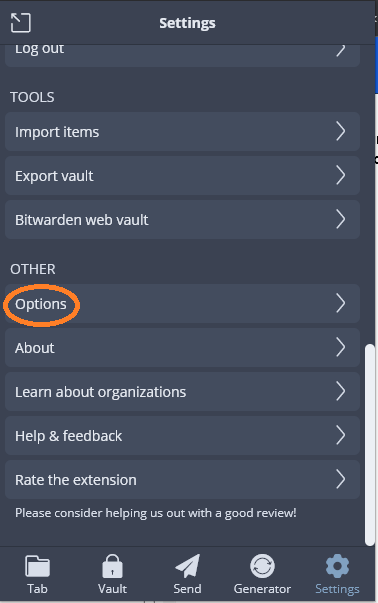
Hey @lenraphael keep scrolling to the bottom, you’ll see a header for OTHER then select Options, and scroll down to the AUTOFILL section at the bottom on the next screen to check Auto-fill on page load.
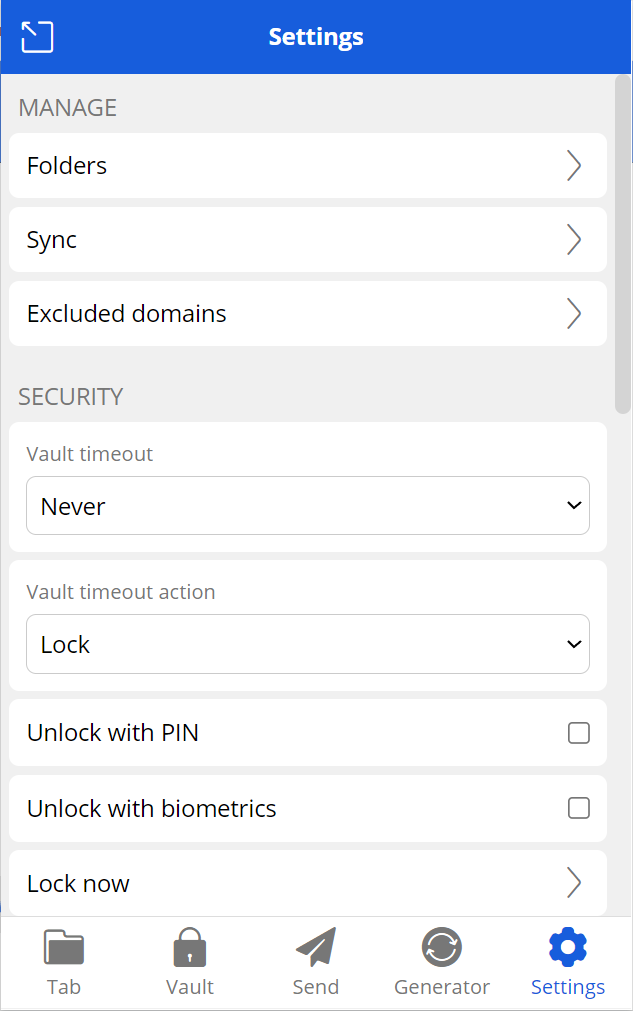
As explained by @bw-admin, use the scroll bar at the right edge of the Settings screen to scroll down to the bottom, which you will find the Options button:
On the Option screen, you again have to use the scroll bar to scroll all the way to the bottom, which is where you’ll find the checkbox that enables the Auto-fill on page load option:
To answer your other question:
The number signifies the number of login account items stored in your vault that are able to auto-fill the current page. If it is larger than one, then the “Auto-fill on page load” may not always choose the account that you wanted (I believe it auto-fills the most recently used account). With Ctrl+Shift+L, you can press that key combination repeatedly to cycle through all of the available login accounts that are matched to the current webpage.
Am i correct that “Auto-fill on page load” cannot be enabled/disabled on an URI specific basis. That it’s all logins with at least one match or none?
You can enable/disable the automatic (“on page load”) auto-fill behavior individually for each saved vault item. However, if one login item in your vault contains multiple URIs, then you cannot individually set some of them to do automatic auto-fill and others to do manual auto-fill only. What you can do, is to set the URI match detection setting for selected URIs to “Never” match, which will prevent any auto-filling (whether automatic or manual) from happening on the corresponding site.
To change the URI match detection setting for an individual URI, edit the vault login item where that URI is stored, then click on the gear ( ![]() ) icon located to the right of the URI, which will bring up a drop-down menu where you can select Never; finally, click “Save”.
) icon located to the right of the URI, which will bring up a drop-down menu where you can select Never; finally, click “Save”.